Register via Dashboard
The dashboard registration form at hq.surge.app walks you through the same fields as the API, with step-by-step guidance and inline validation. It's the fastest path for direct businesses registering once.
It's also the only path for toll-free number verification today — there is no API equivalent.
Prerequisites
Before you start, have these ready:
- Surge dashboard access: Sign in at hq.surge.app.
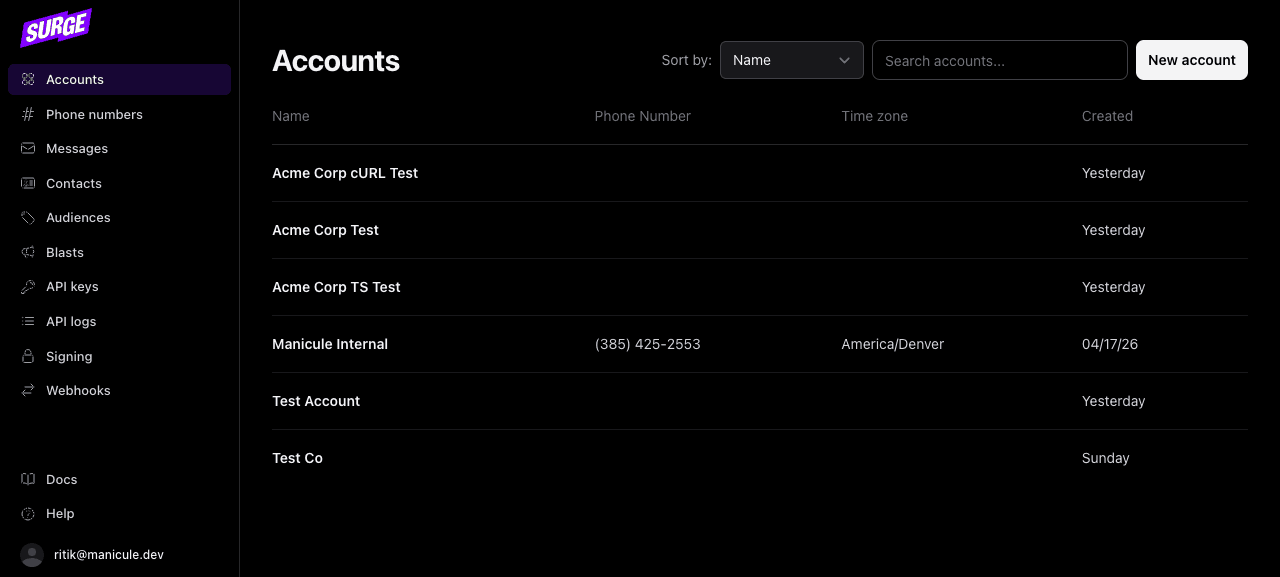
- An account selected: Pick one from the Accounts page or create a new one.
- Business and campaign details: Tax ID, website URL, privacy and terms URLs, opt-in flow description, 2–5 sample messages.
Open the registration form
On the chosen account, click Register or Complete Registration to launch the form.
The form is a 10-step wizard with a progress sidebar on the left.
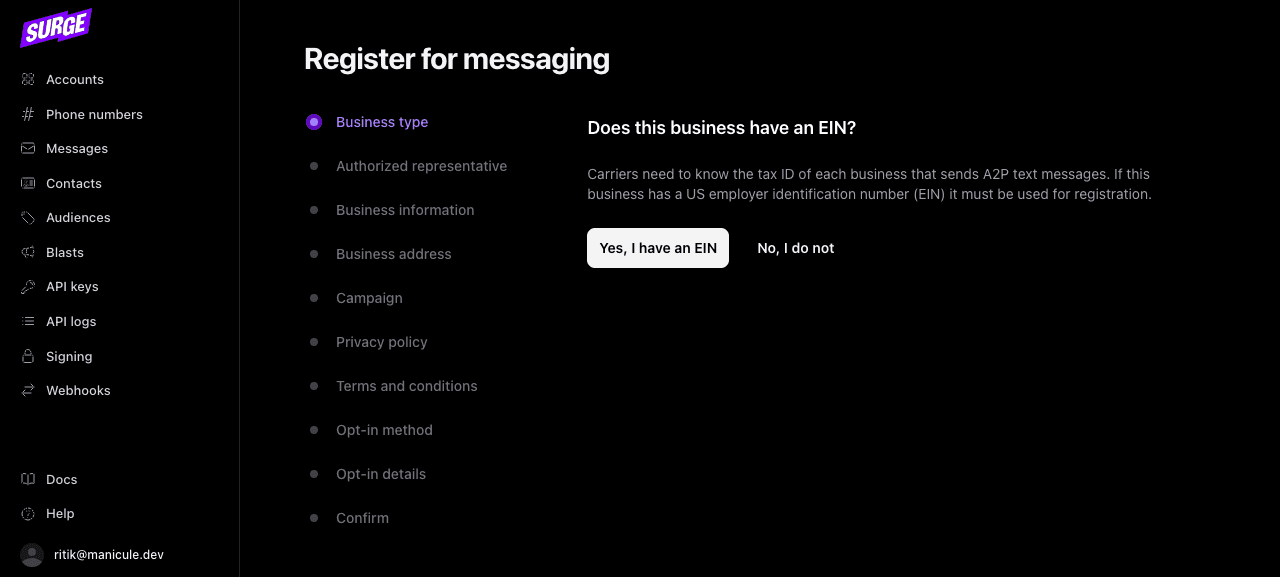
1. Business type
Carriers require a tax ID for every business that sends A2P text messages. If your business has a US Employer Identification Number (EIN), choose Yes, I have an EIN. Sole proprietors without an EIN choose No, I do not and follow the Sole Proprietor Path.
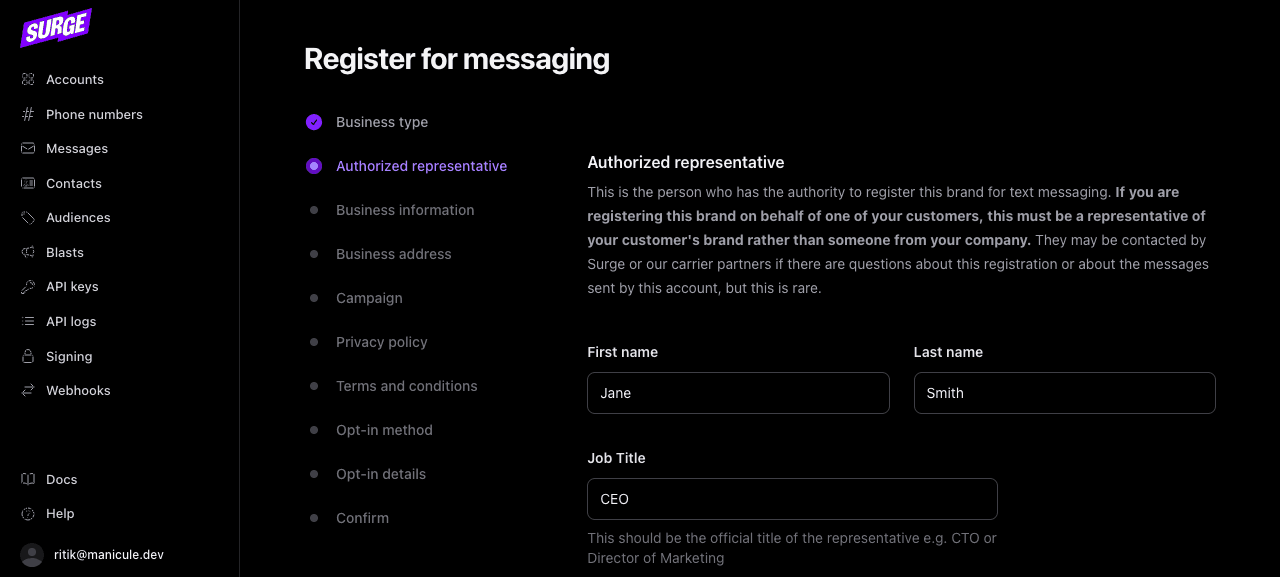
2. Authorized representative
The person who has authority to register this brand for messaging. If you're registering on behalf of one of your customers (a vertical SaaS pattern), this must be a representative of the customer's brand, not someone from your platform. They may be contacted by Surge or carrier partners if reviewers have questions.
3. Business information
Legal business name, EIN, website URL, industry, and regions of operation. The website must be publicly accessible and clearly reflect the brand, reviewers visit it and reject brands whose sites don't match the registration. See Avoiding Rejection → Business identity consistency for the most common pitfalls here.

4. Business address
The legal address registered to the business. This must match what's on the EIN/CBN registration record carriers cross-check against.
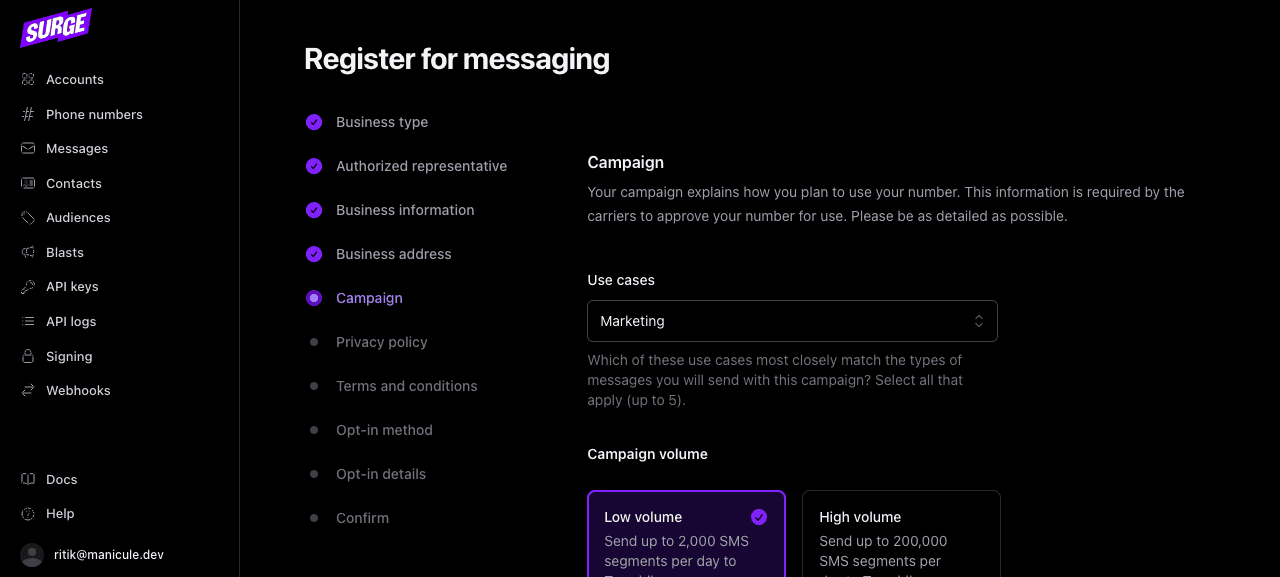
5. Campaign
What you're sending: use cases (marketing, customer care, two-factor auth, etc.), expected volume, whether messages contain links or phone numbers, and 2–5 sample messages.
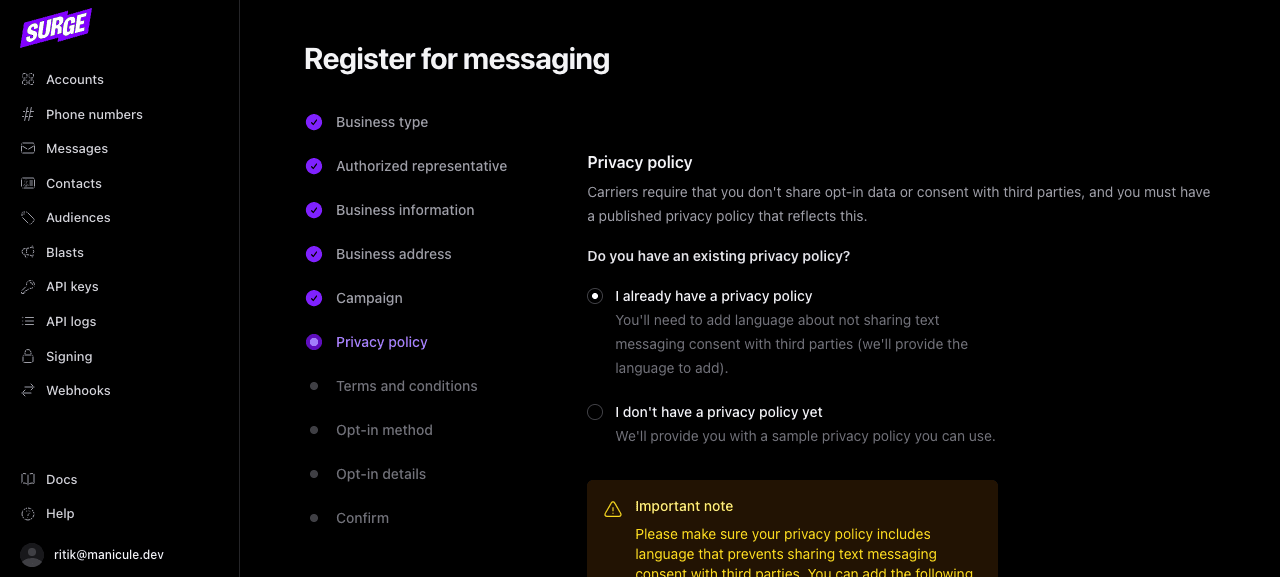
6. Privacy policy
The URL of your published privacy policy. Must be publicly accessible (not behind a login) and must reference your text-messaging program.
7. Terms and conditions
The URL of your published terms of service. Same accessibility rules as the privacy policy.

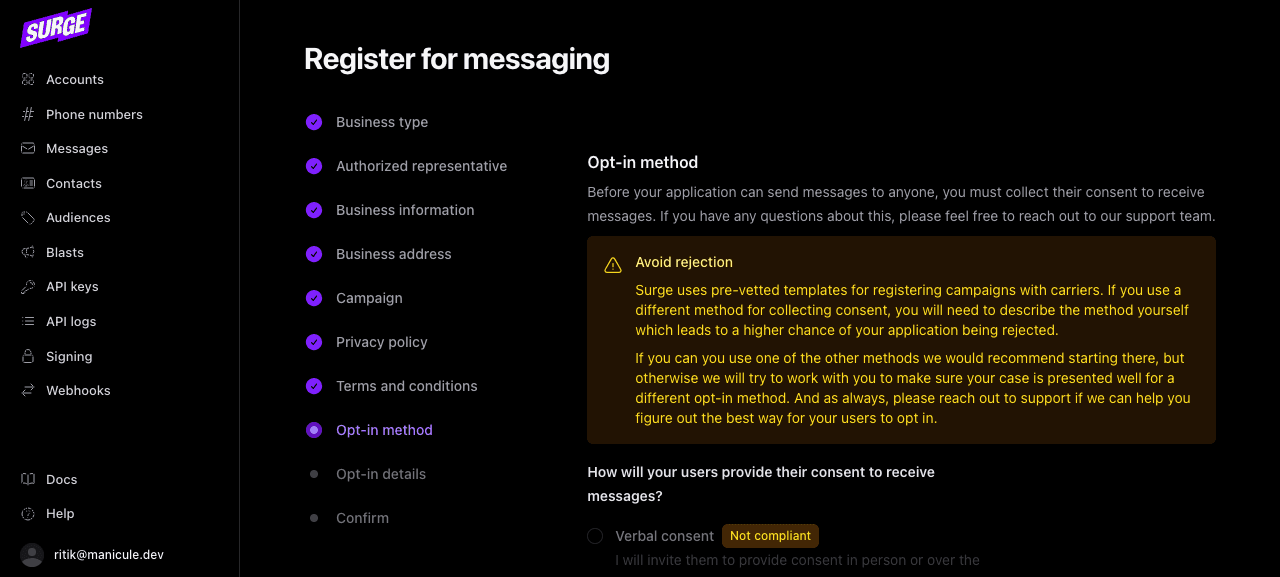
8. Opt-in method
How users consent to receive messages. Pick from web form, mobile QR code, paper form, verbal consent, or a keyword reply. This maps to the consent_flow field in the API.
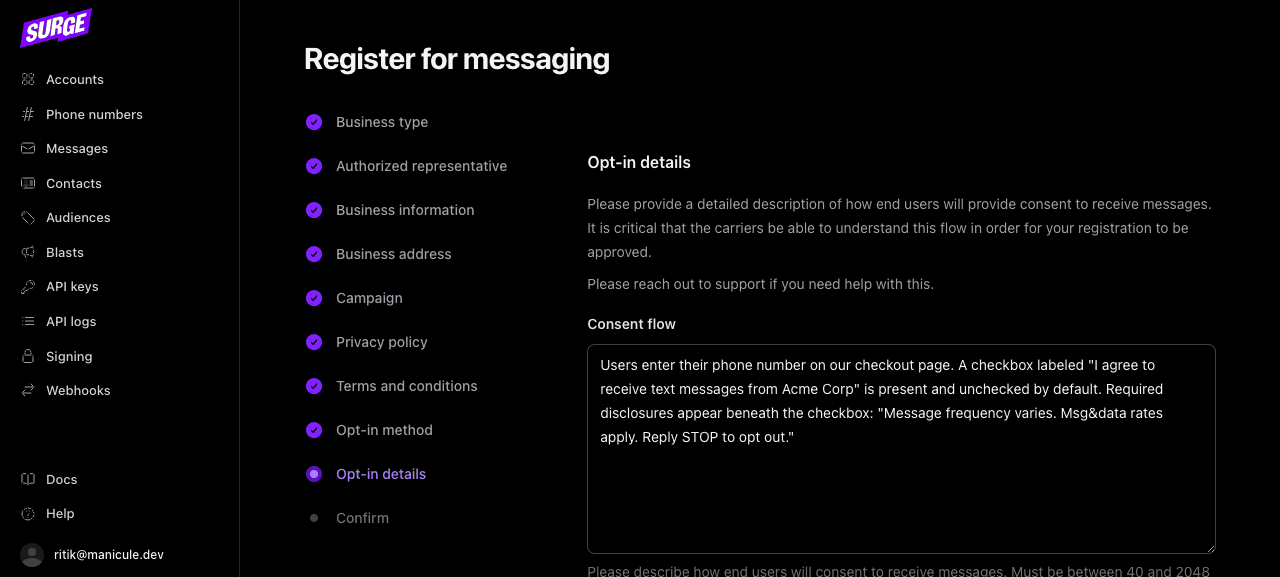
9. Opt-in details
A plain-English description of your opt-in flow plus the URL where the opt-in happens. Reviewers visit this URL, so it must be live and show the consent flow you described. See Schema Reference → consent_flow for what makes a strong description.
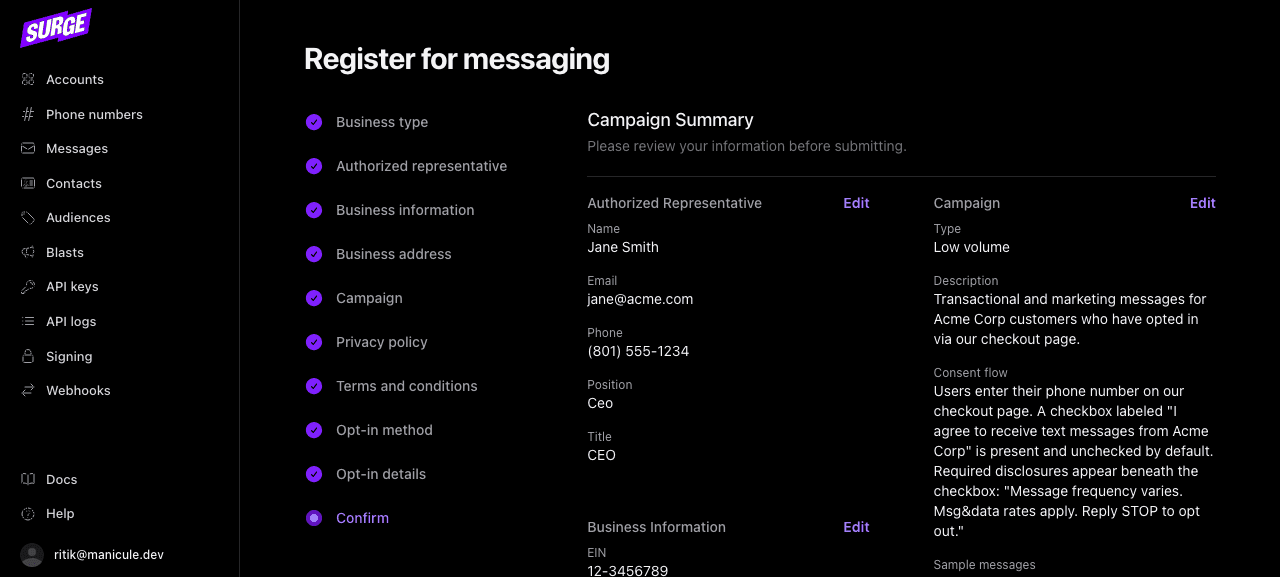
10. Confirm
A read-only summary of every value you've entered. Edit any section directly from this page; only submit once everything looks right.
Sole proprietor path
If you selected No, I do not on Step 1, you're routed through a sole-proprietor variant of the form with different disclosure requirements. See Sole Proprietor Path for details.
After you submit
The form submits everything to Surge, which sends it to the carrier network. You'll receive an email when the campaign status changes, and you can track status in the dashboard under Accounts → [Account name] → Campaign. If the campaign status becomes changes_needed, Surge sends an email with reviewer feedback — see Fixing a Rejected or Changes-Needed Campaign for how to respond.
Toll-free registration
Toll-free verification is dashboard-only and uses a separate flow from 10DLC. See Toll-Free Verification.